Creating a conformation page before inserting a record
Quite often you'll want to allow your users to check and confirm input data before actually adding it to the database. UltraDev includes some useful tools to make this process simple.
First, you need to create your form to collect the data. For this example, I'm going to use a very simple form with just two fields - studentName and studentAge.
Here's how my form looks.
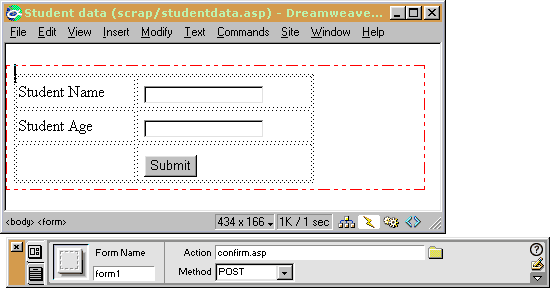
Note that I'm using the POST method to submit this form to a page called confirm.asp - the page that will be my confirmation page.
The confirmation page needs to perform three functions. The first is to display the input data so that the user can visually check it. The second function is to Insert to the database if the user is happy. If the user is not satisfied with what is being shown, then the third function is to redirect them to a page where they can modify the data.
In order to display the data, we need to read it in from the previous form. On a new page, which I've saved as confirm.asp, we need to select the Request Variable option from the Data Bindings Palette.
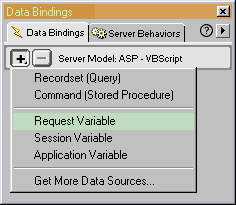
We need to do this for each item in our form. The options for Request Variable look like this
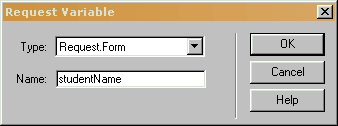
I've selected the Type to be Request.Form because my data is coming from a form on the previous page. I've set the Name to the name of the first input field on my form, which was called studentName.
When I click OK, I can see that the variable has been added to my Data Bindings list - just like when we define a recordset.
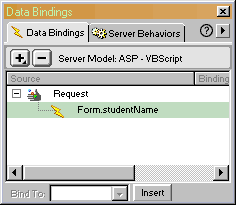
I then need to repeat this process for each field in my form until they are all listed.
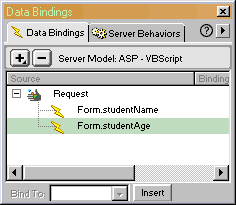
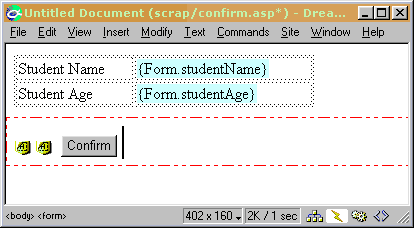
Creating your page to display these variables is then exactly the same process as if the values were coming from your database - simply drag them onto the page.
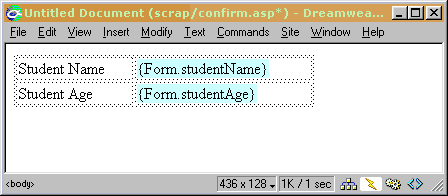
It's all very well being able to display the values - but we really also need them as form input so that we can update the database. So how is that done?
The trick is to use hidden fields. Create a form at the bottom of your page and insert a hidden field (they can be found on the Form section of the Object palette).
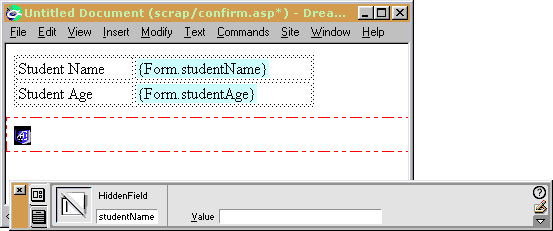
As you can see, I've given this hidden field the same name as my original field in the first form. We will need to create a hidden field for each field in your form.
In order to carry the data across, we need to populate this field with the corresponding data. This is done by going to the Data Bindings palette (with the hidden field still selected), choosing the matching data and clicking the BIND button.
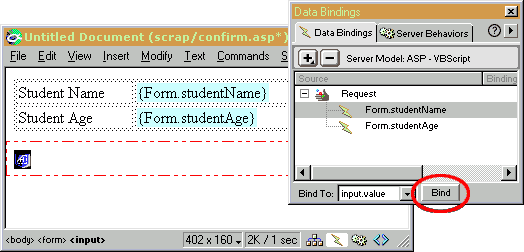
I've circled the BIND button in red - it's sometimes easy to overlook it down there! Once clicked, you should see the server code entered into the Value box in the Property Inspector.

Repeat this for each field, and insert a Submit button when you're done. I'm going to give my Submit button a label of 'Confirm'.
The next step is to apply the Insert Record Server Behavior to this form. The mechanics of this process are covered in the "Adding an entry to your Recent Updates list" tutorial.
You should now have a working confirmation page. The next tutorial covers the process of adding the facility for users to correct data if they are unhappy.

