Updating an entry from your "Recent Updates" List
So you've just added a nice new entry to your list and Shock! Horror! you've made a spelling mistake! Or maybe you've made more additions to your site later in the day and would like to append to an existing entry. Either way, we need a method for updating an entry.
Like the Insert and Delete Record server behaviors, UltraDev comes to the rescue with an Update Record server behavior.
The process of updating a record is very similar to that of deleting one - that is to say it comes in two stages:
1. Find the offending item
2. Update it.
Stage 1: Finding the record
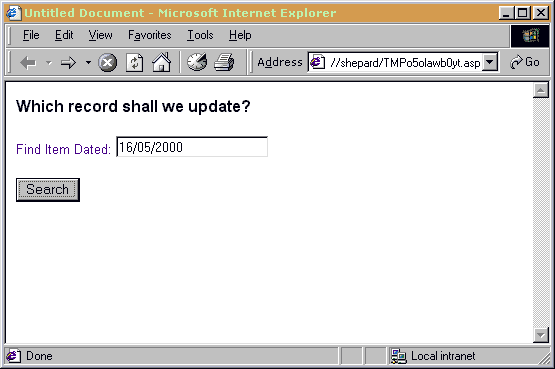
You need to create a page with a form. The form needs to include the field we are going to search on - in our case Date.
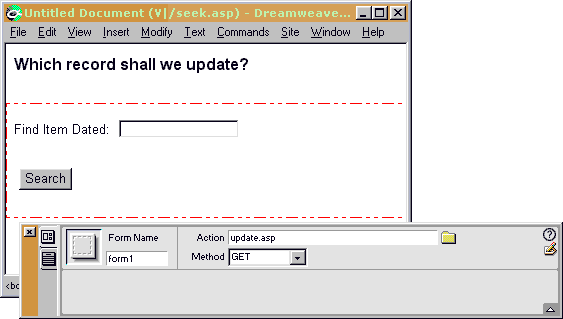
I've again given my text field the same name as the database field - Date. The clever bit with this form is that we just submit it to another page. If we enter the name of another ASP page as the Action, and set the Method to GET, then the designated page will be able to pick up the output from the form.
You can save this page and worry about it later. Time to move on to Stage 2.
Stage 2: Update the record
We now need to create a page to accept the output from this form. This page needs to do a number of things:
Create a recordset based on the output of the previous page
Display the date for visual confirmation
Display the current information in a text box for editing
Provide a button to perform the update.
Create a new page, and we'll define a Recordset like we did before.
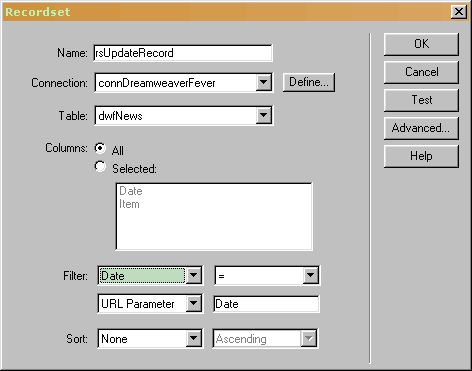
The important thing about this recordset is that it uses a filter. The filter as shown above is based on the Date field. The recordset is going to be filled with any records where the Date field matches the Date parameter passed through to the page (with the URL).
Basically, for us, this parameter is the value we entered in the form on the previous page. The results of the form will be passed along with the URL and this recordset filter will pick those up and use them to make its selections.
In our circumstance, the Date is only going to match one record. We will end up with the one record recordset which is exactly what we need for performing our update. Click OK.
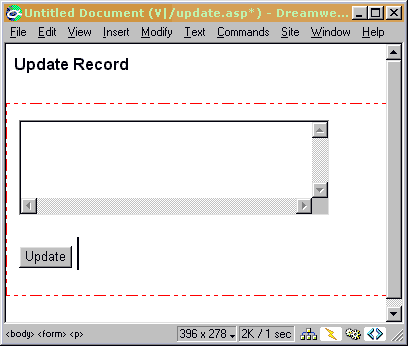
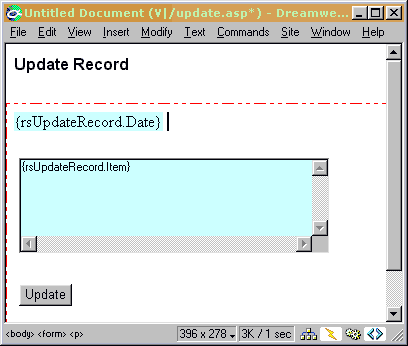
We now need to create a form with a field for every database column that we want to update. For the Recent Updates list, we only have one column which will need updating - 'Item' - so I'll create a form with one text field and a submit button.
I've named my textfield 'Item' to correspond to the column name in the database.
The next thing we need to do is to enter the current value for the 'Items'
column into the text box. This will make it easy to make changes to the
text without having to retype it all.
Just as you would insert normal data items on to the page, you can insert
one into a text box. I find it most comfortable to grab the item from
the Data Source window and drag it into the text box.
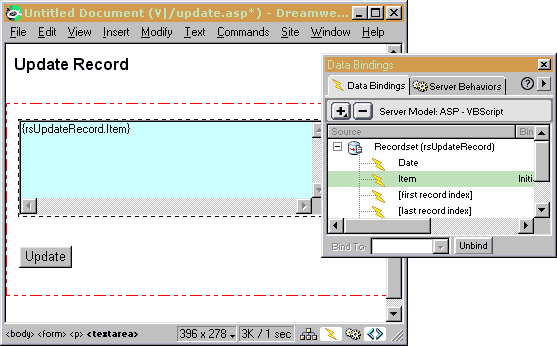
I'll also insert the Date field onto the page as a visual confirmation for the user. It's a good design tip to make the user feel as comfortable about what they're doing as possible when asking them to fill in a form. Being able to see the date of the item will help to reassure the user that they are making changes to the correct record.
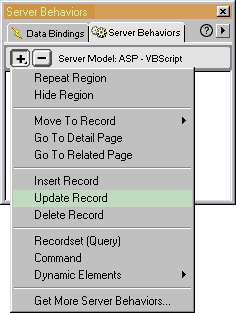
All that's left to do now is apply the Update Record Server Behavior.
The Update Record dialogue box looks like this:
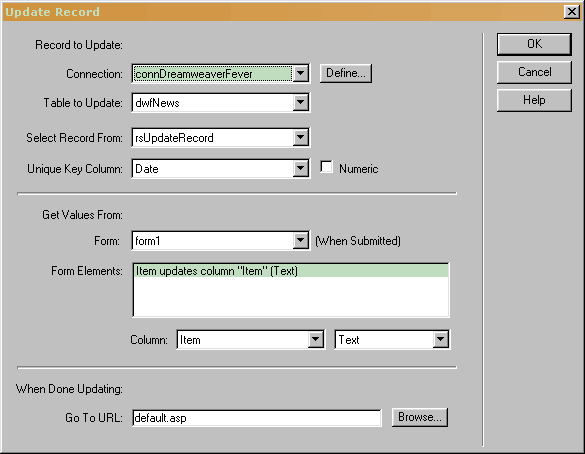
You'll notice that most of the fields are black until you select your Connection at the top. Once you've done that, most of the other fields will work out reasonable values for you.
Once your connection, table and recordset are selected, the important bit is mapping your form fields to the database columns. Because we gave our field a name which corresponded to the database column name, UltraDev has picked that up and made the mapping for us.
Pay special attention to the second box next to the Column heading. This lets you choose the data type. For our circumstance it's just Text - but for your own projects make sure you make an accurate selection otherwise your Update may not work. Special care is needed if you are inserting a date field or if your field is a checkbox.
Lastly, choose a page to redirect to after the Update, and click OK.
Let's see how it looks..
and then ...
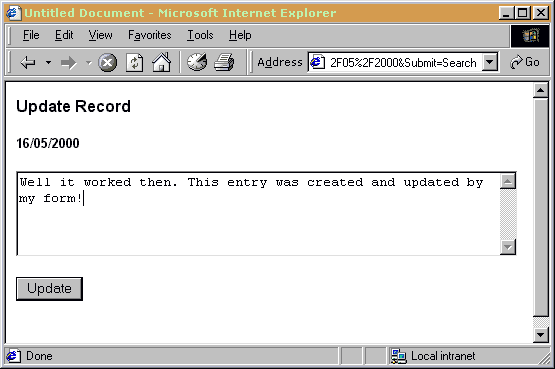
Click Update and see your changes take effect! It really is as simple as that.